
Paint Stripping

Yesterday, I stripped the paint from my astraea..I'm planning on modding it that's why I stripped the paint off..anyway, here are some pictures :)

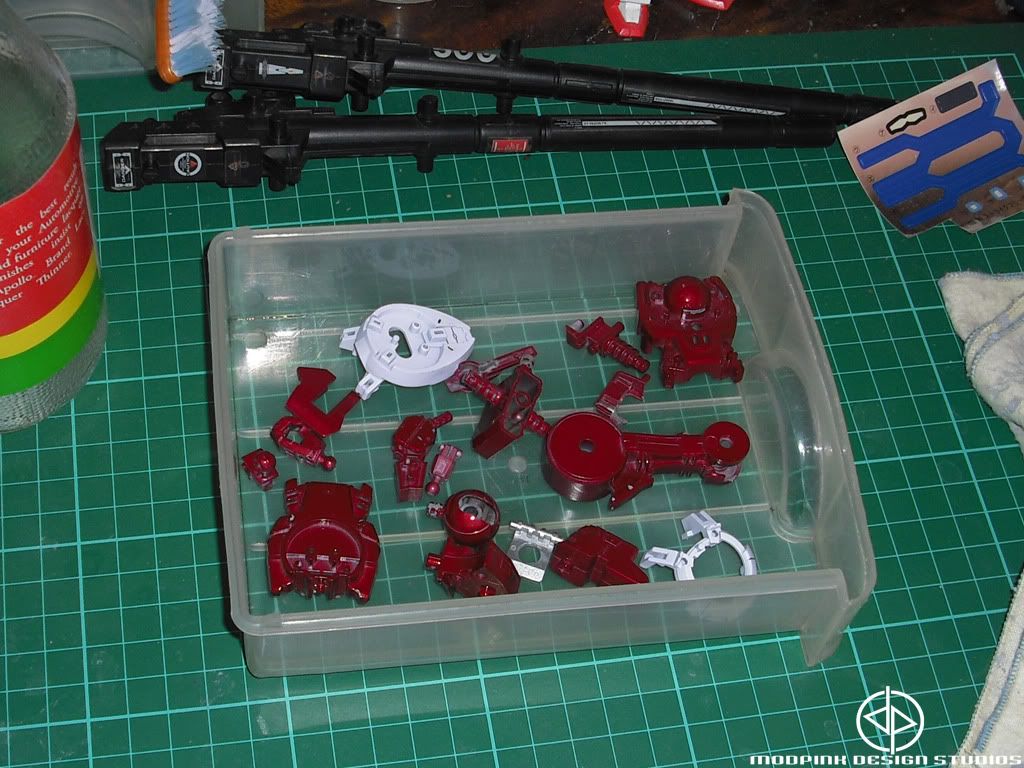
Prepping the parts to be stripped~


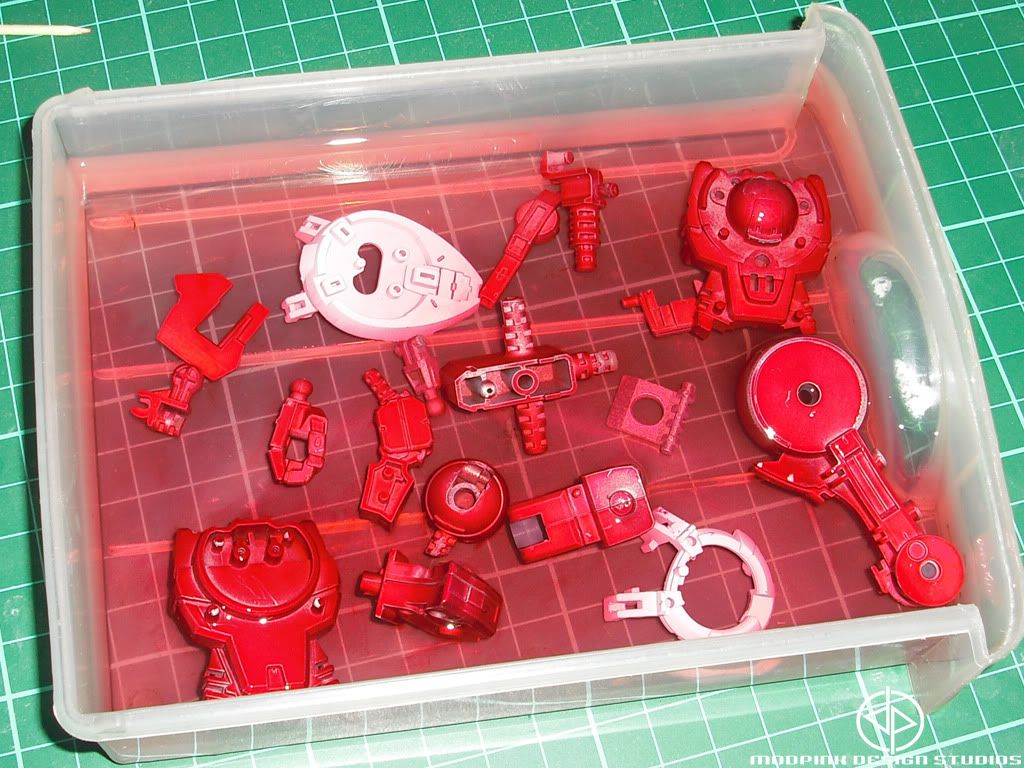
Poured in the denatured alcohol, and look..the paint are already getting stripped! :D


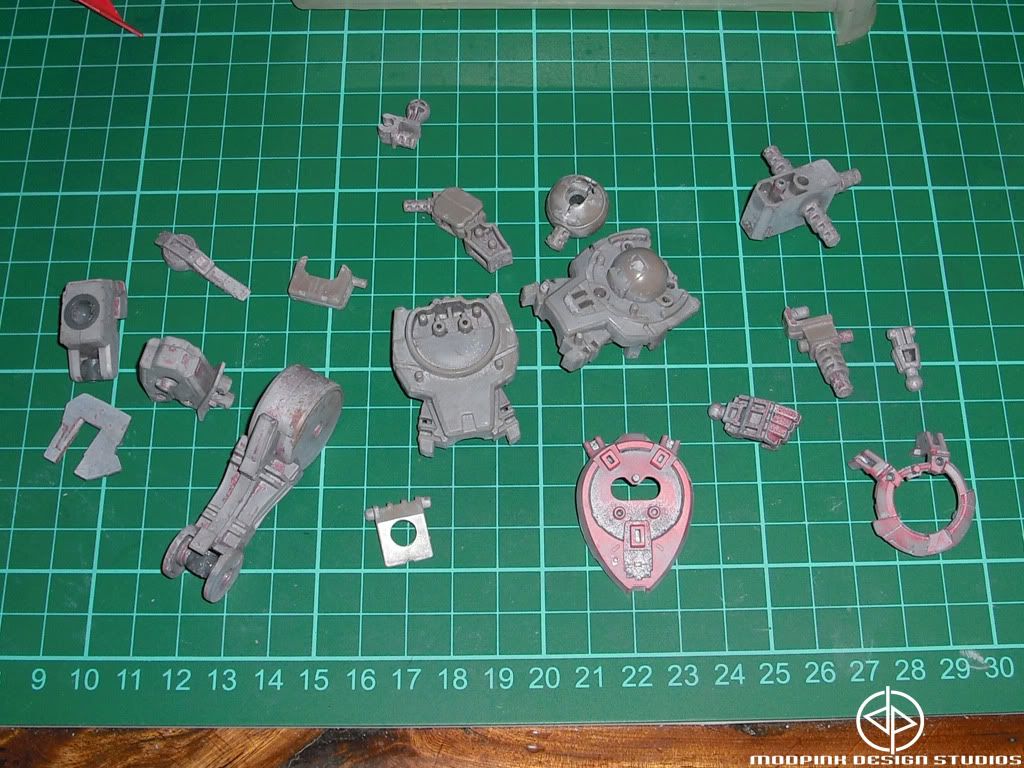
After 3-4hrs, I brushed the parts~


This is what it looks like now~

Comments

  1. What brand of denatured alcohol was that?

    ReplyDelete
    Replies
    1. AFAIK, It really doesn't matter what brand you use as long as it's a 'Denatured Alcohol'. But anyway, the brand I used on this one was 'Tiger'.

      Delete
  2. Did you experience any brittle pieces after doing this? I've got several old kits I'd love to overhaul, but I'm concerned about making them fragile in the process.

    ReplyDelete
    Replies
    1. Yeap I did. That's why I don't really recommend this when you want to remove the paint from your kit. I now always go for acetone when doing so. http://mrpinkzeon.blogspot.com/2011/09/paint-stripping-via-acetone.html

      I do apologize for the late reply. Been on a hibernate on this hobby for quite some time now.

      Delete

Post a Comment

Popular posts from this blog

What's Inside The Box: SD Kshatriya

Mr. Pink tried using 'Future' Pledge :D

I was looking for a cheap alternative for gloss topcoat to do my panel wash on my IJ since Bosny's Clear Gloss is too thick for me, and remembered that I saw on sir DC23's blog that he uses this Future Pledge to do the job, also, I asked sir T.V.A. *The Virgin Angel* with regards to using Pledge/Future for topcoating before panel wash..and I bought one right away XD..anyway, here are the photos of what I did on some scraps XD.. What I did was painted the part chrome and then, applied Future/Pledge on it.. Verdict: Seriously, it's so EASY to use. You don't have to do something like mix it with other stuffs before applying on the kit. You don't have to even worry about brush marks/strokes since it's self leveling. And it's shiny! XD So, if you guys are looking for a cheap alternative for your gloss coat, I highly recommend this one XD.. Till then! :D

HG Shaldoll Ver. Odium WIP #01

Did something to my HG Shaldoll :D (This is btw, our Brando Bell Group Build) First of, this is what I plan on doing on it's backpack. Next, I did some cutting on the backpack in order for me to attach the thing that will hold the TA's boosters. Then I trimmed down the part that will hold the Tactical Arm's boosters, so it can fit in. I then attached the boosters on the backpack of the Shaldoll. Next is, I worked on the head. The eye lens for me is too big, so I decided to make it a bit smaller somehow :). Using a .5mm HIPS (High Impact Plastic Sheets) I did this. Sanded the putty I applied, and primed it to see if there are still something to work on. Still needs a lot of work on the head though haha :)). Removed the design on the body, and replaced it with a koto part. And oh! Look! It can transform now! haha! I also added wings on the shoulder armor, still working on it. Till next update~